Synology NAS-to-NAS backup with Snapshot Replication, Part 1: The build
I went over a year without a real backup of my primary NAS.
Not “no backup ever.” I had cloud copies of the things I’d consider critical, like active project files and photos that mattered most. But the bulk of what’s on my 7×14 TB Synology was unprotected. About 45 TB of footage, archives, Docker container data, and household stuff that, if a drive controller died or I fat-fingered a delete, was just gone. The mental weight of that was the kind of thing you stop noticing, until you notice, and then it’s all you can think about.
This is part 1 of a three-part series on fixing that. Part 1 (this post) is the build. Part 2 is what went sideways during the first sync and how I diagnosed it. Part 3 is what I’m thinking about doing next, which may mean a different backup destination, or piecing one together from hardware I already have on hand.
The full picture: ~45 TB of source data, with the first replicated share (VideoProjects) weighing in at about 11 TB on its own. No new hardware was bought for any of this — both boxes and every drive in them were already on the rack, which is part of why the build felt overdue rather than ambitious.
The two NASes
The setup is two Synology boxes on the same LAN.
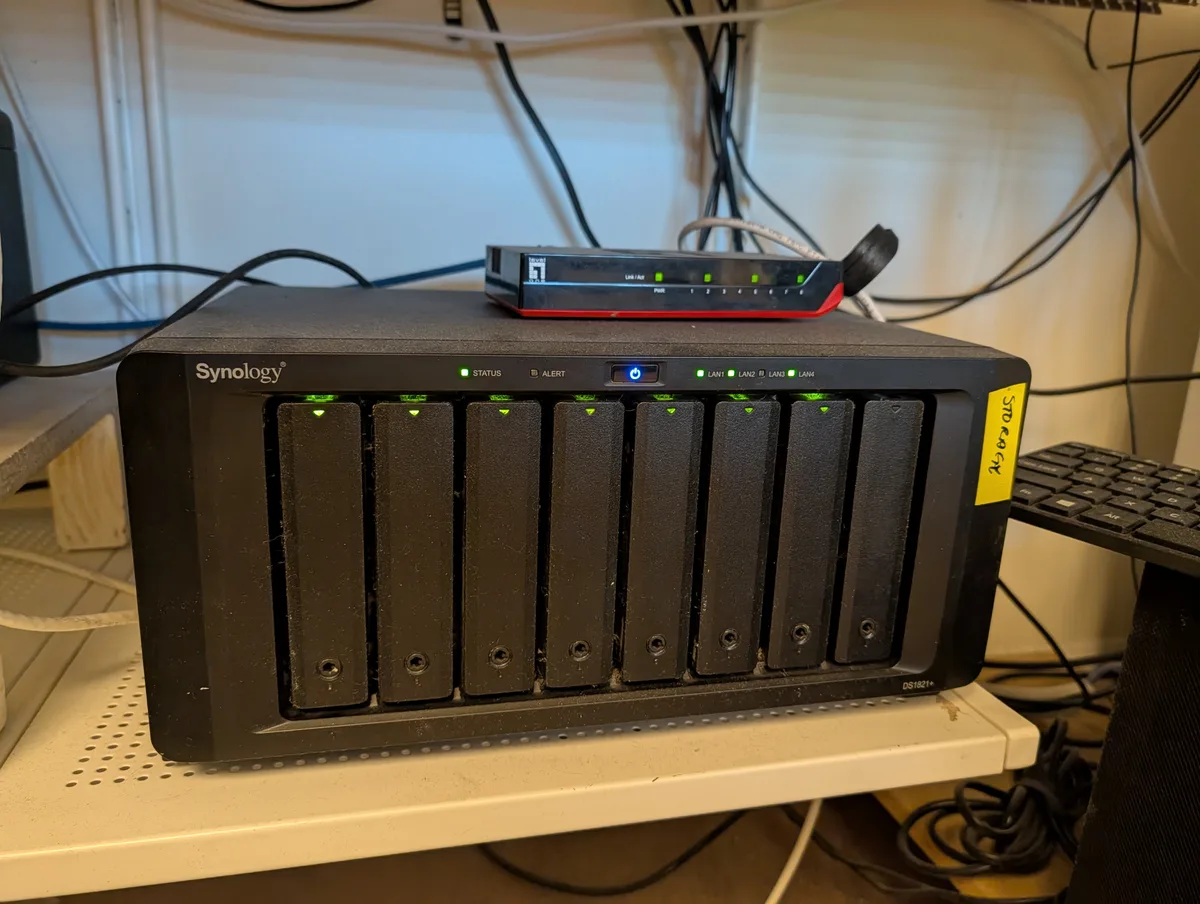
The primary NAS is the source, the working box where data actually lives:
- Synology DS1821+ (8-bay)
- AMD Ryzen Embedded V1500B, 4 cores @ 2.2 GHz
- 32 GiB RAM
- 7× 14 TB drives in SHR-2 (RAID-6 underneath, two-disk fault tolerance)
- ~62 TB usable, ~45 TB used
- DSM 7.3.2
- Quad 1 GbE plus a dual 10 GbE add-in card
The backup NAS is the destination:
- Synology DS1815+ (8-bay)
- Intel Atom C2538, 4 cores @ 2.4 GHz (Avoton, roughly 12-year-old architecture)
- 1.94 GiB RAM
- 8× 8 TB drives, a mix of Seagate IronWolf, Western Digital Red Plus (WD80EFAX/WD80EAZ), and HGST, in RAID-5
- ~50.87 TiB usable
- DSM 7.1.1 (terminal version, since the DS1815+ does not support DSM 7.2)
- Quad 1 GbE, no 10 GbE option
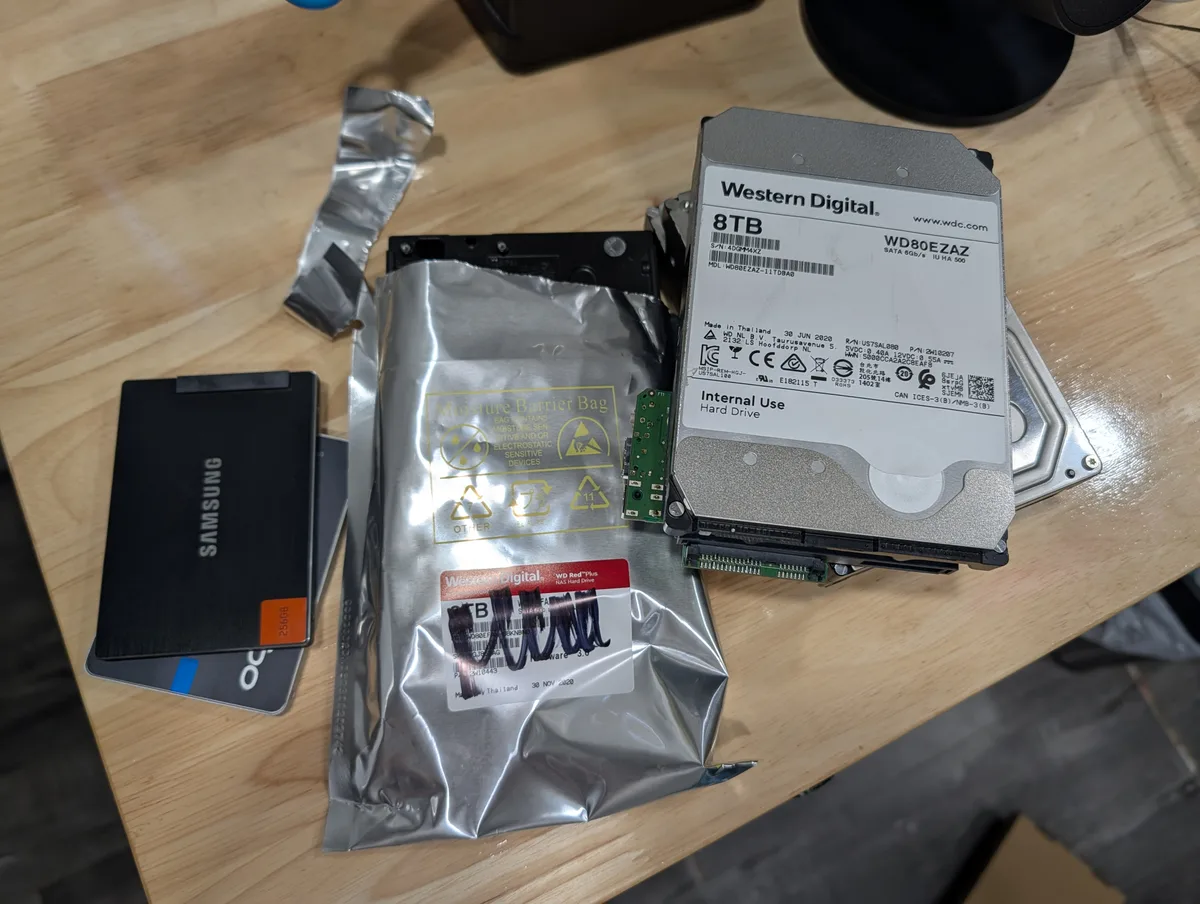
The backup NAS isn’t a fresh purchase. It’s actually the box that used to be my primary. When I outgrew it and bought the DS1821+, the older eight-bay didn’t go away. It sat in a closet for a while waiting for a second life, and this is it. The drives in it are the same drives that filled it when it was the primary, which is why the manufacturer mix is what it is. Drives got added one at a time over the years.
That backstory matters for what comes later in the series. The backup NAS is older, slower, and frozen at the last DSM version it’ll ever get. For part 1, though, the question was simpler. It has eight bays, it has slots full of drives, and it’s just sitting there. Use it.
Why Snapshot Replication, not Hyper Backup
Synology gives you two main first-party options for NAS-to-NAS backup, and I went back and forth before picking one.
Hyper Backup is the more general tool. It backs up to almost anything (other Synology, USB, cloud, rsync target, S3-compatible) and stores backups in a proprietary archive format. It’s flexible, but the archives need Hyper Backup Vault (or equivalent) to read.
Snapshot Replication is BTRFS-native. It uses btrfs send and btrfs receive under the hood to replicate snapshots block-by-block to another Synology. The replicated data lives on the destination as plain BTRFS subvolumes, accessible at /volume1/<share>/#snapshot/<timestamp>/ on the target with no Synology software in the loop.
I picked Snapshot Replication for one reason that overrode everything else. If the Synology platform vanishes tomorrow, my data is still readable. Plain BTRFS volumes can be mounted in any Linux box. There’s no proprietary archive format I’d need to crack open. That kind of platform-portability matters more to me than Hyper Backup’s flexibility.
The other things I liked, but didn’t decide on:
- It’s block-level, so deltas after the initial sync are tiny. A 100 GB share that got 200 MB of changes ships about 200 MB, not 100 GB.
- Low CPU overhead in steady state. Initial sync is a different story, which is part 2.
- Snapshots are visible as plain directories, so I can browse “the backup NAS’s view of this share three days ago” via SMB without restoring anything.
The downsides (same Synology vendor on both sides, no archive history beyond your retention count) were acceptable for my use case.
A real pre-flight on the destination
Before pointing 11 TB at the backup NAS, I wanted to make sure the box itself was actually healthy and configured correctly. I called this Phase 0:
- Confirmed BTRFS on the destination volume. Snapshot Replication requires it on both ends.
- Documented the DSM version ceiling. DS1815+ stops at DSM 7.1.1, so no security or feature updates beyond what’s installed. Acceptable for a LAN-only destination, but I want it documented so I never forget when planning the next phase.
- Tested SMTP notifications. The box had a notification configured, but I’d never actually sent a test email through it. I sent one. It worked. I trust it now.
- Reviewed notification rules. A few months back, the same box finished a long RAID-optimize and didn’t tell me. Turned out the relevant rule wasn’t on by default. I left the rules as they are now (storage, volume, and drive-failure events are covered, which is what actually matters).
This stuff felt slow at the time. It’s the kind of work that doesn’t show up in screenshots and feels like a tax on getting to the “real” task. But skipping it is exactly how you end up with a backup that’s been silently broken for two months.
Snapshot Replication setup, with the things nobody tells you
The first surprise, and the one that genuinely annoyed me, is the per-share-per-task structure. Snapshot Replication does not let you bundle multiple shared folders into one task. Each share gets its own task: configure the connection, pick the share, set the schedule, set retention, set the transfer window, set encryption. Then do it all again for the next share. I was setting up four shares. I had to run the wizard four times.
This is worth flagging up front so future-me (and you) don’t get caught by it. Plan one wizard run per share you want to replicate. If I were writing a tutorial, I’d open with this. The official docs do not. Between the four wizard runs and re-checking each one’s settings, the per-share-per-task tax alone burned the better part of an evening.
The second surprise was small but worth noting. Encryption. Synology offers SSL encryption for the replication transport. On a trusted LAN with an Atom CPU on the destination, encryption adds CPU cost without buying you anything you don’t already have via the LAN being trusted. I left it off. (If your replication is going over an untrusted path, turn it on. But then you’d probably also be on a more capable box.)
The decisions I made for the four shares
Once I understood the structure, the decisions per share were quick:
| Share | Size | Schedule | Retention |
|---|---|---|---|
| VideoProjects | ~11 TB | Sun + Wed 02:00 | 3 snapshots |
| homes (per-user folders) | small | Sun + Wed 02:00 | 3 snapshots |
| Proxmox (VM data) | medium | Sun + Wed 02:00 | 3 snapshots |
| Archive (older bulk storage) | medium | Sun + Wed 02:00 | 3 snapshots |
A few of those need explanation.
Why three snapshots? This was the decision I expected to overthink, and didn’t. Three snapshots, about a week and a half of recoverable history at a Sun/Wed cadence, is enough for the threat model I actually have:
- Active editing happens on an external SSD, not on the NAS. The VideoProjects share is for archive, plus pulling b-roll into newer videos. So the data on the NAS isn’t being modified the way working files are.
- The NAS shares are mostly archival or append-only. Files don’t get edited in place; they get added.
- Deletions on the NAS are deliberate, not accidental. I don’t need to recover from “I dropped a folder yesterday” because I don’t drop folders yesterday.
I went over a year with zero backup of the primary NAS. Going from zero to “twice-weekly snapshots with 1.5 weeks of retention” is the upgrade. I can always raise retention later. There’s plenty of capacity on the destination.
Why Sun + Wed? Two snapshots a week is a comfortable middle for a NAS where most data sits still. Daily would mean retention of three days, which felt too short. Weekly would be too thin. Sun + Wed catches both ends of the work week and gives me something to fall back on either side of any weekend project.
Why these four shares? These are the things I’d actually mourn losing. Photos, video projects, household digital life, the data behind my Proxmox VMs. Not a complete picture of the NAS, but the part where loss would hurt.
What’s deliberately NOT being replicated
The big share I’m skipping is Plex media. That’s a deliberate call:
- Re-acquirable. The Plex library is built from media I actually own (Blu-rays, DVDs, even some VHS in the older corners). The physical shelf is the backup. If a disk catastrophe took the media volume, the path back is rip-and-restore from the source, not retrieve from a backup target.
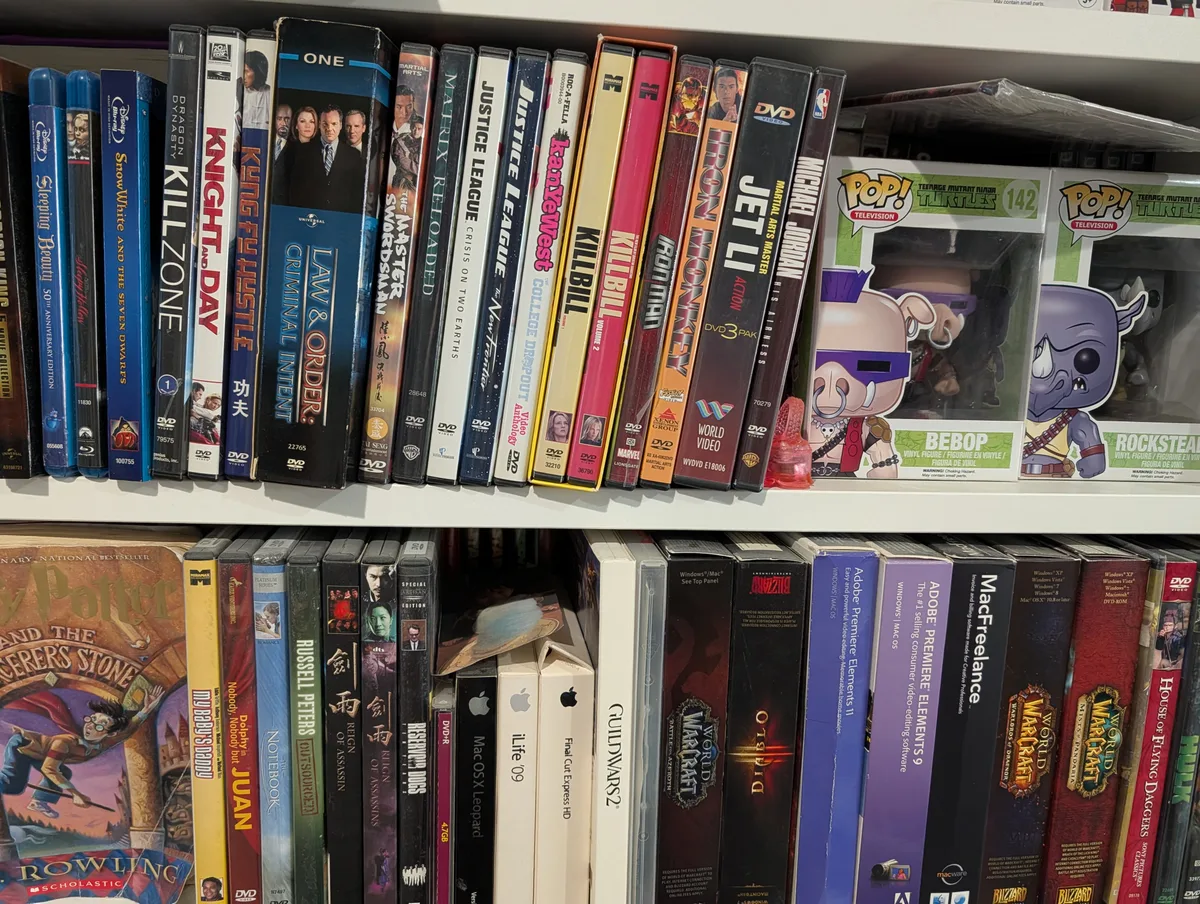
- Big enough to dominate the backup story without earning its keep. The actual irreplaceable bits aren’t the files. They’re the library structure: watch state, playlists, posters, metadata, the stuff that makes the library feel like mine.
So the plan for Plex isn’t to back up the media. It’s to back up the library structure separately, and treat the media itself as something I can rebuild rather than restore.
This distinction matters more than people give it credit for. Not everything that’s big is worth backing up. The question isn’t “can I afford to lose this?” It’s “if I lose this, do I want a backup, or do I want a recipe to rebuild it?”
And then I started it.
I kicked off the VideoProjects task at 17:13 on a Friday evening, watched the throughput climb to a steady ~62 MB/s, smiled, and went to dinner.
The next day, things were not what I expected.
That’s part 2.
Coming next: Part 2: What went wrong, and how I diagnosed it. Sustained throughput that turned out to be misleading. An overnight death I couldn’t immediately explain. CPU pegged on a single core on the destination. Drives bored. And one of those moments where the diagnosis was much more interesting than the symptom.
And after that: Part 3: What I’m doing next. Whether the answer is a new NAS, or repurposed hardware I already own, or something in between.
Leave a comment
Comments are moderated, so it may take a bit before yours appears. Your email is never published.